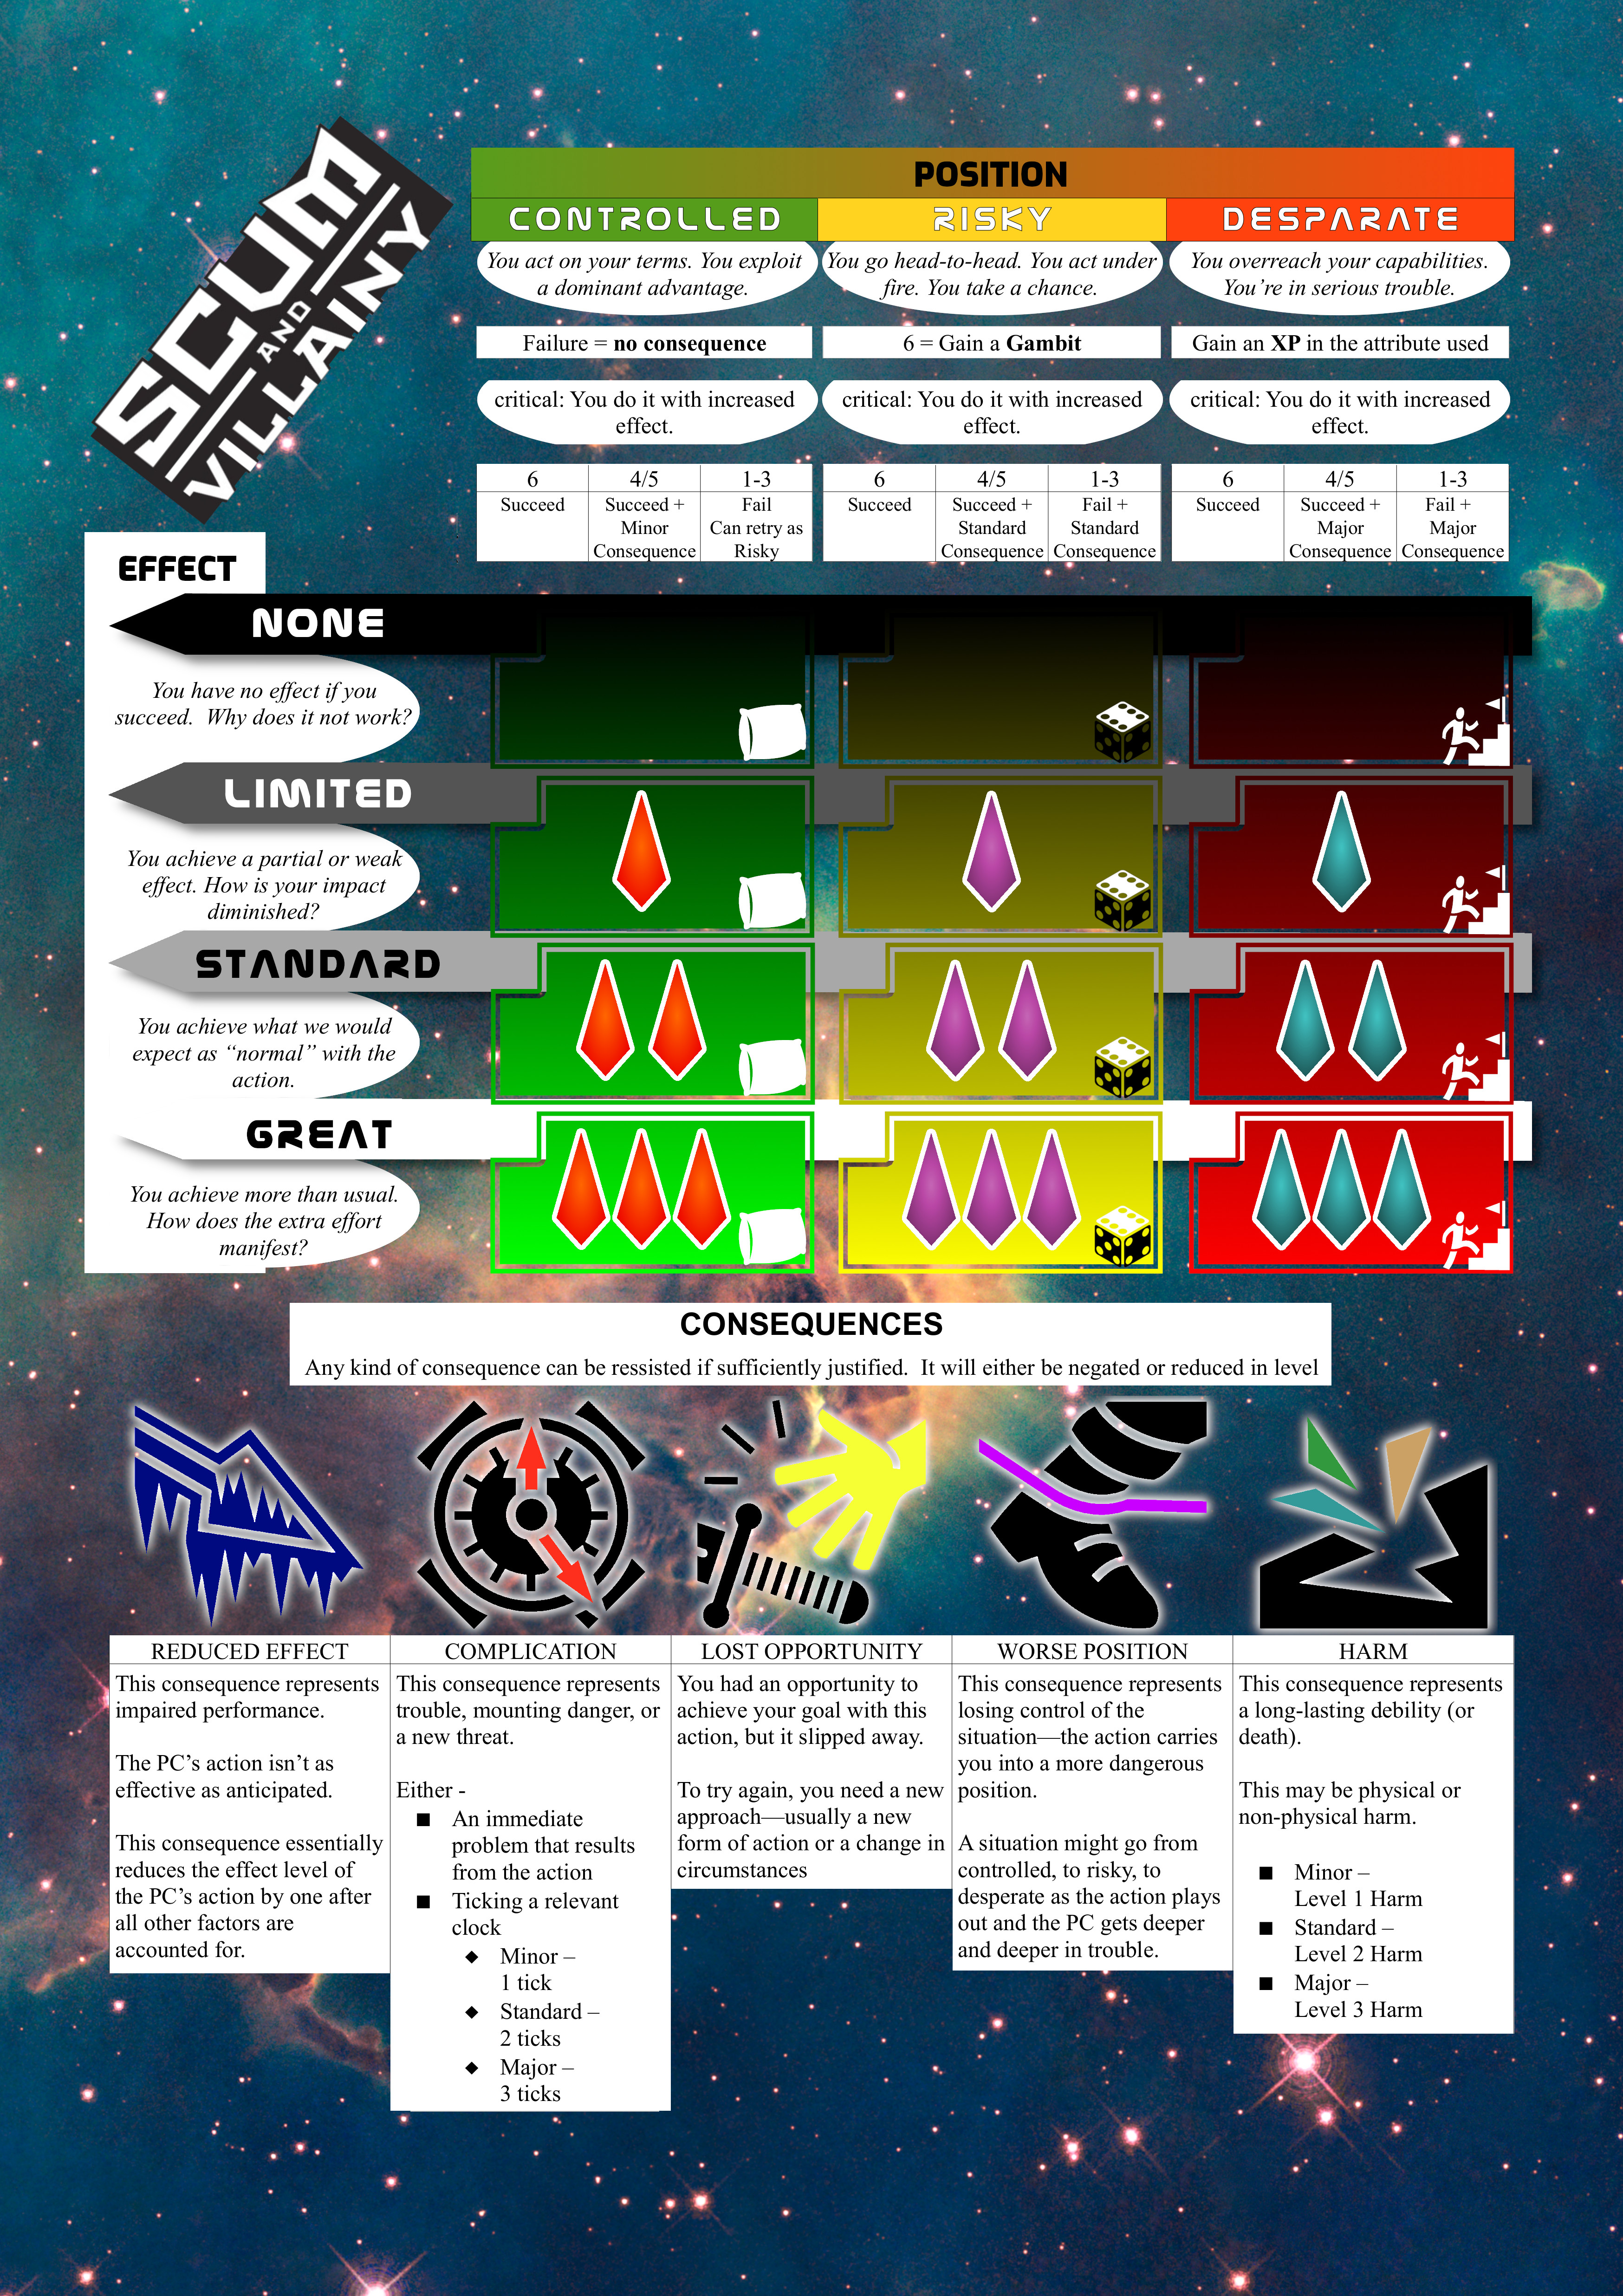
Here’s a simple OpenOffice created PDF meant for A3 paper (and colour) to help aid with action resolutions. As we’re all new and it’s a big table with lots of players - my idea here is to place an obvious marker on the sheet showing their position/effect and move it as appropriate based on how they approach the challenge. Icons are from my favourite icon source - game-icons.net
Under controlled it says: “Failure = No consequences”, but further down it says “4/5 succeed + Minor consequences” and the retry as risky. How is that to be interpreted?
It is my understanding that, on a failed success roll, players have the option of pressing on by seizing a risky opportunity or else withdrawing and try a different approach. So, there would be no consequences other than a shift in position. On a partial success roll, players again have the option of withdrawing and trying a different approach or else accepting the action with a minor consequence.
Pretty much. We’ve only had one session so far and no controlled miss, so I had to double check that’s what it said in the rulebook. I didn’t want to spell out the whole thing though as it’d be unwieldy to fit and I’m thinking that familiarity later in the game will make it unnecessary. I might do a pretty GIMP one later for folk wanting to use lots of ink.
For the Controlled blurb, something like “Consequences are less severe” might work. I suggest it because it covers the reduced impact of consequences for both partial success and failure. It is admittedly a little subtle as the user would need to know consequences happen on partial success and failures. So maybe “Reduced consequences on 4/5 or 1-3” would fit in the box.
There’s consequences on a controlled 1-3? I was going by page 23 on the rulebook. Actually, looking at 205 and “allways a consequence” - it specifically says the consequence of a 1-3 fail on Controlled is that if you keep going you have to do it as risky, alternatively you can not do it at all.
Well, I consider “press on by seizing a Risky opportunity” to be the Worse Position consequence (page 33). I consider “withdraw and try a different approach” to be the Lost Opportunity consequence (page 33). It doesn’t explicitly state these are consequences in the Contolled 1-3 field, but page 23 doesn’t do that for any other Desperate entry either. Edit: Also, Worse Position is not referred to by name in either Contolled or Risky failure entries, but I think it’s implied because the next Position down is bolded in both entries.
In my opinion, being forced to back off and try something different or being forced to accept more risk by carrying on with the same approach are consequences to me. They’re relatively mild in the grand scheme of things, but the bottom line is that the PC can’t do what they originally wanted to do at the high level of safety they had. If there really were no consequences to failing a Controlled roll, then a PC could continue trying their original approach at Controlled position regardless of the result of the roll.
Regardless of my opinion, I still consider the play aid to be very useful, especially to newcomers to the game!